
//TRUSCREN Installation Guide
Mobile Phone Screen Installation Tutorial
Follow a safer and more professional process for testing, installing and inspecting mobile phone replacement screens—before adhesive, before film removal and before customer handover.

21
Years
Expertise
We provide Service anytime
Replacing a mobile phone screen is not only a matter of removing the damaged display and connecting a new one. The device condition, exact screen version, frame, connectors, motherboard and installation method can all affect the final result.
TRUSCREN recommends a complete pre-installation test before removing protective films, applying adhesive or permanently fixing the screen into the device.
Million Monthly Sold Africa
Trusted Partners
Screen defect rate
Do not remove the protective film or apply adhesive before testing.
Complete model verification, temporary connection, full display test, touch test and relevant sensor checks before permanent installation.
Find instructions for your phone model.
Standardizing these rules can reduce avoidable product damage and after-sales disputes.

IPhone SCREEN FIX TUTORIAL

OLED CURVED SCREEN FIX TUTORIAL

INCELL SCREEN FIX TUTORIAL
IPhone BATTERY REPAIR GUIDE
Your Ultimate Mobile Phone Screen LCD Solution - Truscren
As a leading provider of high-quality mobile phone screen LCD screens, Truscren offers an unparalleled experience for users across Africa. We understand the need for authenticity and reliability in the phone repair industry. That's why we provide LCD screens of various brands, including Apple, Samsung, Infinix, and more. Our screens are designed to deliver superior performance with high color gamut, FHD resolution, high brightness, and original configuration solutions.
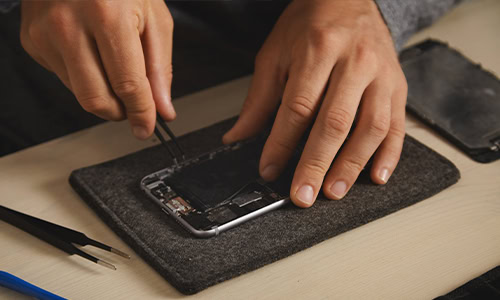
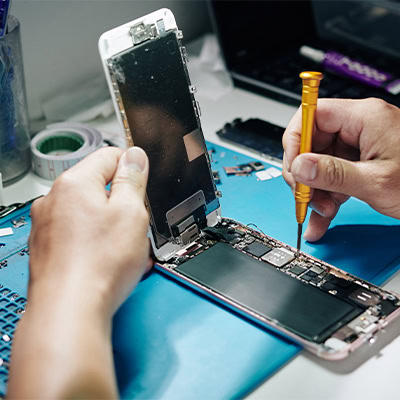
Follow a controlled screen-replacement workflow.
Each step protects the product, the customer’s device and the reputation of the repair business.
STEP 01
Verify the Exact Model
Confirm phone model, model number, regional version, connector, openings, frame option and screen technology.
STEP 02
Inspect the Device
Record display, touch, frame, housing, battery, charging and liquid-damage condition before repair.
STEP 03
Organize the Work Area
Prepare lighting, screw layout, tools, adhesive and safe broken-glass handling before disassembly.
STEP 04
Power Off & Open
Power off, remove the SIM tray where required and open the device according to the model procedure.
STEP 05
Disconnect the Battery
Battery first when disconnecting. Battery last when reconnecting. Never connect the new screen under power.
STEP 06
Remove the Damaged Screen
Apply controlled heat, protect internal flex cables and preserve original paired components
STEP 07
Inspect Connectors
Check display sockets, pins, brackets, corrosion, dust, bent components and motherboard condition.
STEP 08
Inspect the Replacement Screen
Check glass, frame, flex cables, connectors, product label, openings and protective film.
STEP 09
Temporary Connection & Test
Connect the screen without adhesive and complete display, touch, brightness and sensor tests.
STEP 10
Prepare the Frame
Remove adhesive and glass, check frame flatness, clean all edges and complete a dry test fit.
STEP 11
Transfer Components
Move original earpiece, cameras, sensors, brackets and paired biometric components carefully.
STEP 12
Apply Correct Adhesive
Use a model-specific adhesive without blocking sensors, speakers, buttons or internal openings.
STEP 13
Align and Install
Confirm edge alignment, flex routing and component position before applying even edge pressure.
STEP 14
Secure the Screen
Use controlled clamping and follow the adhesive manufacturer’s curing instructions.
STEP 15
Final Test & Handover
Repeat all functions, remove film only after approval and explain warranty and water-resistance limits.
//ONE-STOP REPAIR SOLUTIONS
Need help identifying the cause?
Stop the installation and prepare the model, product label, connector photos, test video, original-screen result and device condition.
Small installation errors can cause major damage.
Standardizing these rules can reduce avoidable product damage and after-sales disputes.
01
Connecting the screen while the battery is connected
May cause short circuits, display damage or motherboard damage.
02
Removing protective film before testing
Makes condition verification and warranty review more difficult.
03
Applying adhesive before functional testing
Creates permanent installation before compatibility is confirmed.
04
Forcing the connector
Can damage pins, flex cables or the motherboard socket.
05
Installing onto a bent frame
Creates pressure points that may crack or mark the display.
06
Folding the flex cable sharply
May damage internal circuits and cause intermittent faults.
07
Applying pressure to the display center
Can damage LCD layers, OLED pixels or the backlight.
08
Mixing screw positions
Incorrect screw length can damage internal components.
Prepare the complete workstation before opening the device.
Using unsuitable tools increases the risk of damaged screws, scratched frames, punctured batteries and broken flex cables.
01
Basic Repair Tools
- Precision screwdriver set
- Plastic opening picks
- Suction handle
- Fine-tip tweezers
- Magnetic screw mat
02
Heating & Cleaning
- Temperature-controlled heat pad
- Electronics-grade isopropyl alcohol
- Adhesive-removal tools
- Dust-removal stickers
- Lint-free cloths
03
Testing Equipment
- Compatible test device
- Screen tester where applicable
- Multimeter
- USB current meter
- DC power supply for diagnosis
04
Installation Materials
- Model-specific screen adhesive
- Protective tape
- Replacement seals
- Screen clamps
- Component insulation materials
Screen installation questions technicians ask most.
Use the FAQ as general guidance. The exact process may differ by brand and model.
Should I test the screen before installation?
Yes. Test display, touch, brightness and relevant sensors before removing protective films or applying adhesive.
Should the battery be disconnected?
Yes. The battery should normally be disconnected before removing or connecting the display assembly. Follow the correct model-specific sequence.
Why does the new screen have no display?
Possible causes include an unseated connector, damaged socket, incorrect version, flex-cable damage, motherboard damage or device power problems.
Can a bent phone frame damage a new screen?
Yes. A bent or uneven frame can create pressure points, display spots, glass damage or edge lifting after installation.
Will the phone remain waterproof after screen replacement?
Opening the phone may reduce its original water resistance. A replacement seal does not automatically restore the factory rating.
//Your Next Step
Learn a Skill That Can Build Your Future
Every professional technician started by learning the basics. Take the first step with practical training, guided practice and continued effort.